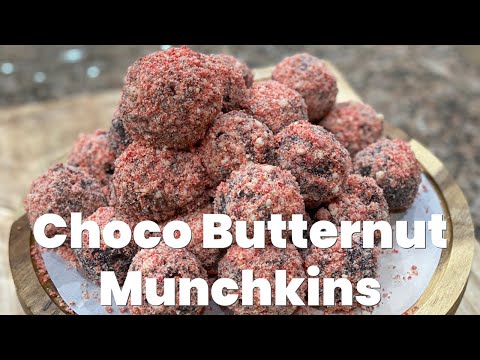
Choco Butternut Munchkins, also known as donut holes, are a unique offering from Dunkin’ Donuts, the Philippines’ premier coffee and donut shop. These delightful treats combine the rich taste of chocolate with the distinct crunch and flavor of butternut streusel. Unavailable in the US, these munchkins have captured the hearts of many with their soft, sweet, and irresistibly chocolatey goodness, all wrapped in a vibrant orange crumb coating.
I have to warn you. This is a complicated recipe. Be ready for a challenge! I recommend watching the video at least once before diving in!
What Makes Choco Butternut Munchkins Special?
The Irresistible Butternut Coating
The term “Butternut” refers to a special mixture that includes shredded coconut, sugar, flour or cornstarch, and powdered sugar. Some recipes even incorporate coconut flakes to enhance the texture and flavor. This mixture is responsible for the munchkins’ signature bright orange coating, known as streusel, giving them their unique appeal and mouthwatering taste.
Crafting Homemade Choco Butternut Munchkins
The Journey to Homemade Perfection
Not being able to find these munchkins in the US inspired me to create a homemade version of this beloved treat. Starting with baked chocolate cakes, I then lavishly cover them in chocolate ganache before finally dredging them in the distinctive bright orange crumbs, also known as streusel.
Exploring the Science of Orange Streusel
Creating the orange streusel is not just fun but also an intriguing exploration of culinary science. I experimented with different shades of orange to perfectly replicate the look and feel of the original treat. Instead of coconut flakes, I opted for powdered milk, which added a subtle creamy texture that complements the chocolatey base beautifully.
The Ultimate Taste Experience
The final product is a melt-in-your-mouth masterpiece that perfectly balances buttery, chocolatey, and creamy textures. It’s a heavenly treat that you’ll want to experience making yourself.
Ready to Make Your Own Choco Butternut Munchkins?
Embarking on the journey to create your own Choco Butternut Munchkins is both rewarding and exciting. The process not only allows you to enjoy a taste of the Philippines right in your own kitchen but also offers a fun and engaging baking experience. Whether you’re a seasoned baker or new to the kitchen, making these munchkins is sure to bring joy and deliciousness to your day.
This easy-to-follow guide aims to make the process accessible and enjoyable for everyone, ensuring that you can recreate a piece of Filipino culinary delight wherever you are. Let’s dive in and start baking!
Ingredients
CAKE PAN NON-STICK
- 1-2 tbsp unsalted butter, softened
- 2-3 tsp unsweetened cocoa powder (you may also use dark if desired)
- 9-inch cutout parchment paper, round
DRY MIXTURE
- 1 ¾ cups all-purpose flour (use unbleached or bleached)
- ¾ cup unsweetened cocoa powder (you may also use dark if desired)
- 1 tsp baking powder
- 1 ½ – 2 tsp baking soda
- 1 ¾ cups sugar (I prefer brown, but use any sugar of your choosing)
- 1 tsp salt
WET MIXTURE
- 2 large eggs, beaten
- 1 ½ cups buttermilk, well shaken
- ½ cup canola oil
- 1 tsp pure vanilla extract
- ½ cup fresh brewed coffee (use decaf or caffeinated)
ORANGE STREUSEL
- ½ cup all-purpose flour (you may also use corn flour or cornstarch)
- 1 cup powdered milk (I used non-fat)
- ¾ cup powdered sugar
- dash cardamom powder (optional)
- dash nutmeg (optional)
- 1 stick unsalted butter, softened
- 1 tsp red food color, gel form + more as needed
- 1 tsp yellow food color, gel form + more as needed
CHOCOLATE GANACHE
- 1-pint (2 cups) of heavy whipping cream
- ¾ cup bittersweet chocolate chips (I use 60% cocoa, use any chocolate chips or bars of your choosing)
- 1 tsp vanilla extract (my apologies as I have forgotten to include this in the list on the video clip)
Items You’ll Need
- Stand or hand mixer
- Cake pan (I used a 9” pan)
- Food-grade brush
- Parchment paper
- Mixing bowls
- Paper towel
- Measuring cups, spoons, bowls
- Cake stand or platter
- Cutting board
- Knives
- Rubber spatulas
- Chopsticks or whisk
- Saucepans
- Wooden spatulas
Instructions
Preparing the Cake Batter
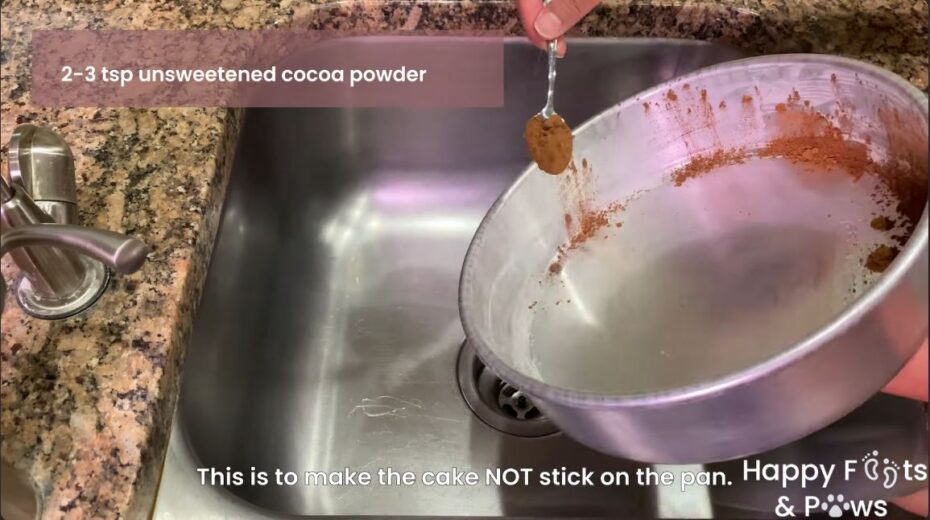
To prepare the cake batter for a delicious chocolate cake, start by greasing all sides of your cake pan with softened unsalted butter, ensuring a smooth release after baking. It’s also a good idea to wipe the lip of the pan with a paper towel for a clean edge.
Next, sift together 1 ¾ cups of all-purpose flour, ¾ cup of unsweetened cocoa powder, 1 teaspoon of baking powder, 2 teaspoons of baking soda, 1 ¾ cups of brown sugar, and 1 teaspoon of salt into a large mixing bowl to ensure your dry ingredients are well combined and free of lumps.
Using either a stand mixer or a hand mixer equipped with a flat beater attachment, blend these dry ingredients until they are thoroughly mixed.
Mix The Wet Ingredients
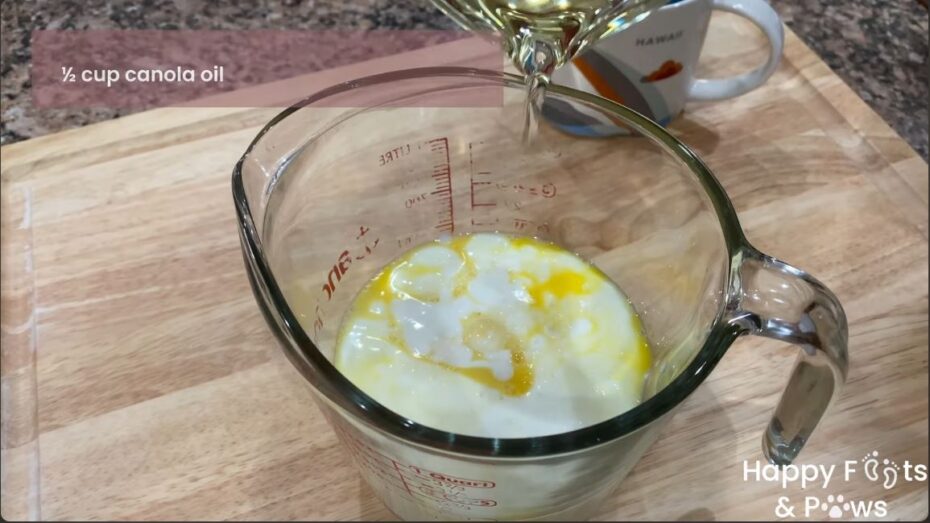
In a separate step, take a medium-sized measuring cup and beat 2 large eggs before adding 1 ½ cups of buttermilk and ½ cup of canola oil to the eggs. Stir this wet mixture until it is well blended to ensure a smooth and homogeneous batter.
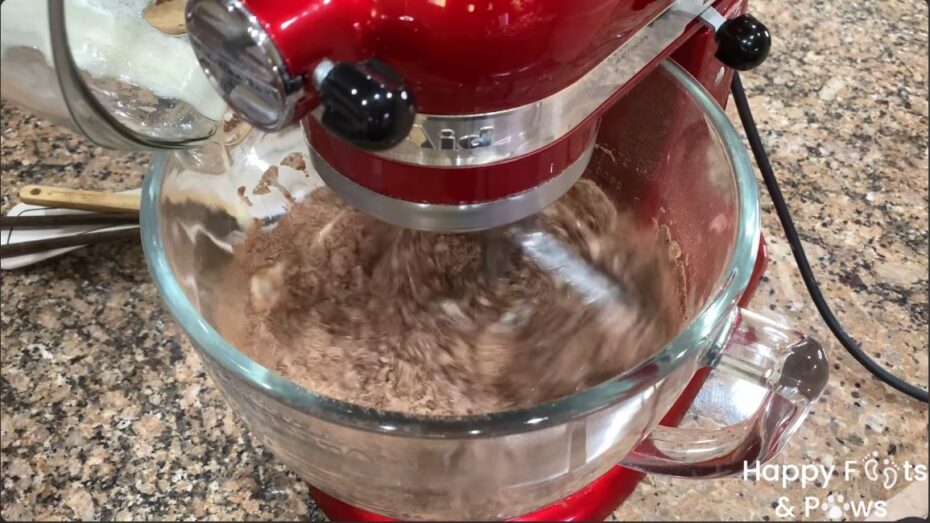
With your mixer set on low speed, gradually pour the wet mixture into the bowl containing the dry ingredients, taking care to mix slowly to prevent splattering. To intensify the chocolatey flavor of your cake, incorporate half a cup of freshly brewed coffee into the batter and continue mixing until the batter is smooth and uniform.
Combine the Wet and Dry Ingredients In The Mixer
Once your batter is ready, carefully pour half of it into the prepared cake pan, smoothing the top with a spatula if necessary. Bake your cake in a preheated oven at 350° Fahrenheit for 25 minutes. This process will result in a moist and richly flavored chocolate cake, ready to be further embellished or enjoyed as is.
Preparing the Butternut Streusel
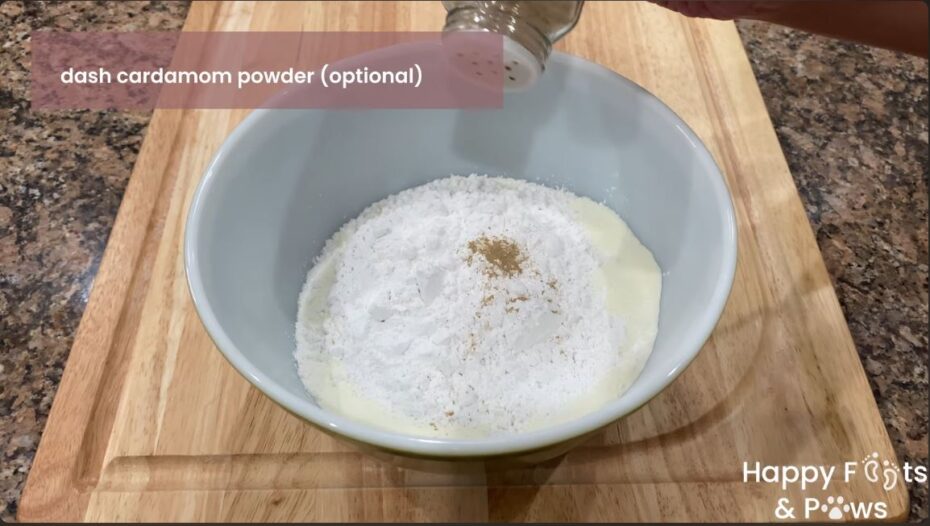
To prepare the butternut streusel, start by combining half a cup of all-purpose flour, 1 cup of powdered milk, ¾ cup of powdered sugar, a dash of cardamom, and a dash of nutmeg in a mixing bowl. Ensure any lumps in the powdered sugar are thoroughly pulverized, perhaps using a pestle for better consistency.
Next, melt a stick of softened unsalted butter in a medium saucepan over medium heat, allowing it to become liquid but not too hot.
Add Some Color
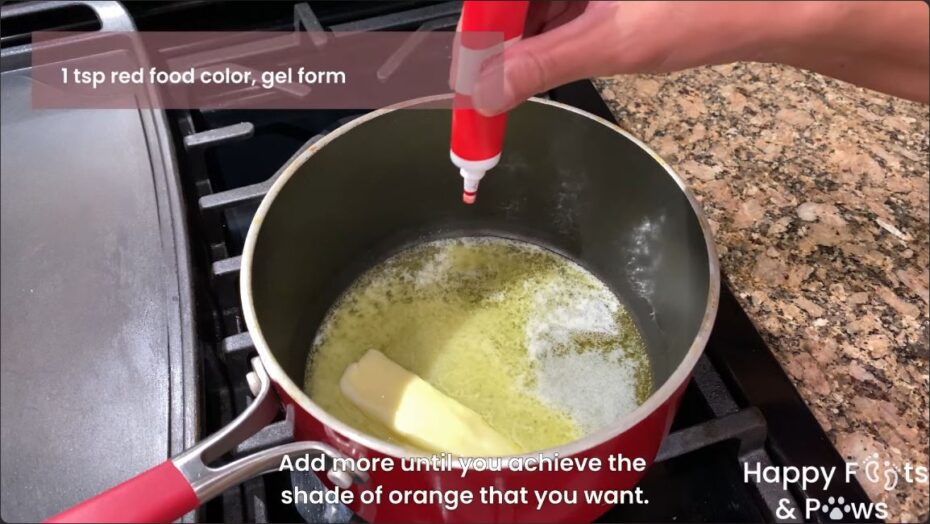
Once the butter is melted, introduce a teaspoon each of red and yellow food coloring to the saucepan, stirring the mixture until it achieves a bright orange color. Gradually add the previously mixed powdered milk combination to the melted butter, stirring continuously to ensure the color is evenly distributed throughout the mixture.
If the color isn’t quite right, feel free to add more food coloring until you reach the desired shade of orange.
Pulverizing Time
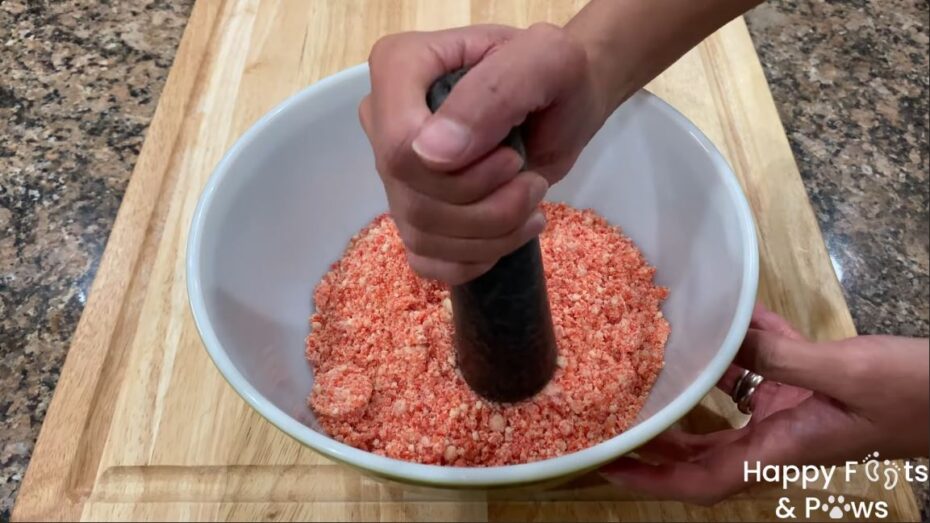
After achieving the perfect color, remove the saucepan from the heat and transfer the streusel mixture into a medium-sized bowl. The final step involves pulverizing and stirring the mixture until it becomes a fine powder, ready to be used for coating or as a decorative element in your baking creations. This process results in a vibrant and flavorful butternut streusel, perfect for adding a pop of color and a hint of spice to your desserts.
Preparing the Chocolate Ganache
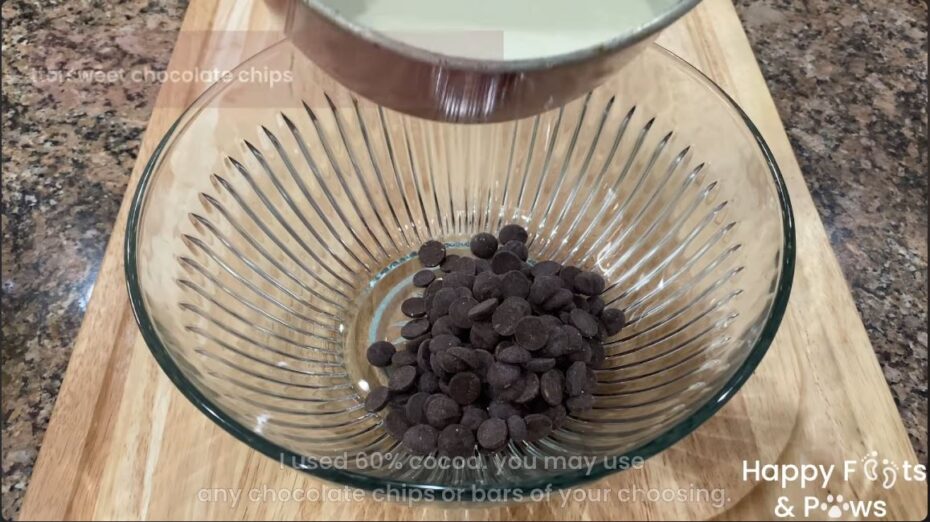
After your cake has finished baking and is set aside to cool, it’s the perfect time to prepare the luscious chocolate ganache that will add a rich, creamy layer to your dessert. Begin by heating a pint of heavy whipping cream in a saucepan over low heat, ensuring you stir it constantly for about 3-5 minutes.
This step is crucial to prevent a film from forming on the surface of the cream. Once the cream is warm and just beginning to simmer, carefully pour it into a bowl filled with ¾ cup of bittersweet chocolate chips. The warmth of the cream will start to melt the chocolate chips.
Add Vanilla
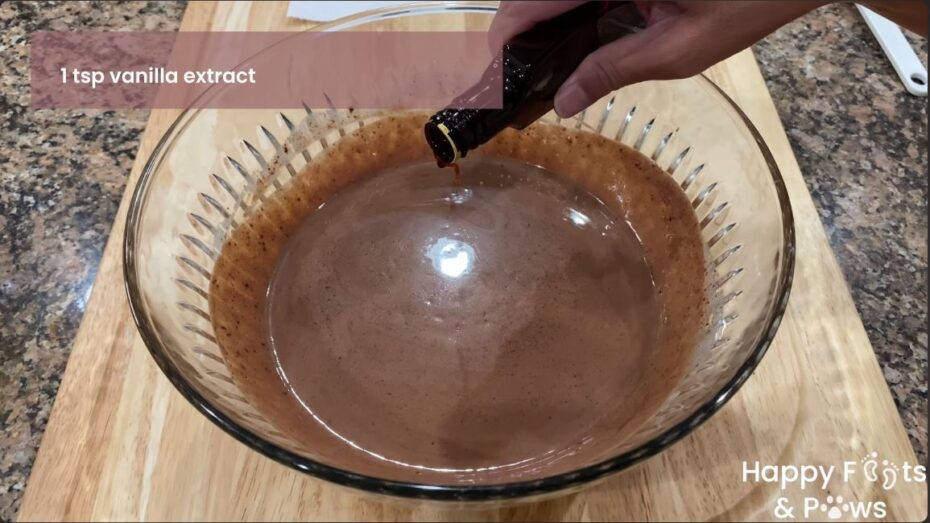
To enhance the flavor of your ganache, add a teaspoon of vanilla extract to the mixture. Stir everything together thoroughly until the chocolate has completely melted and is fully incorporated into the cream, creating a smooth and velvety ganache.
After mixing, set the chocolate ganache aside, allowing it to cool and thicken slightly, making it the perfect consistency for spreading or drizzling over your cooled cake. This step adds a decadent touch to your baked creation, marrying the flavors and textures for an irresistible finish.
Assembling the Munchkin Donuts
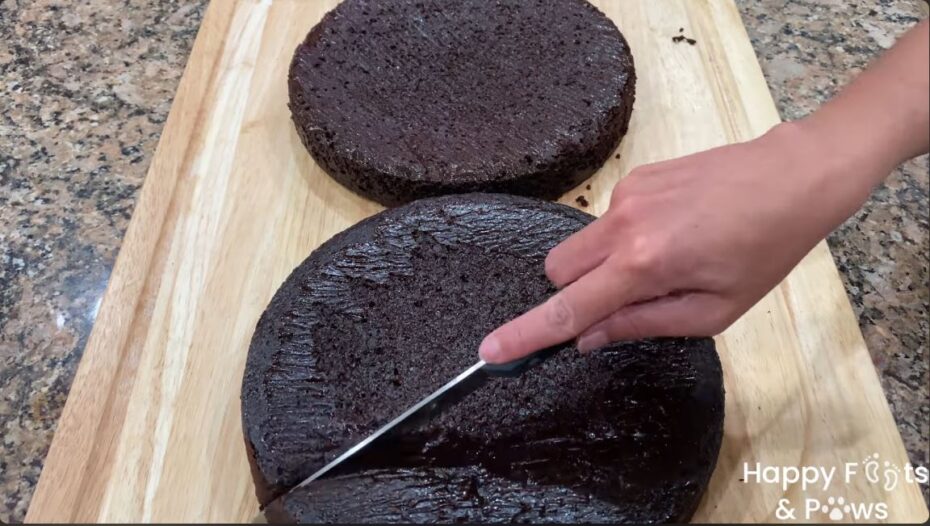
With all the components for the Chocolate Butternut Munchkins now ready, assembling them is the next exciting step. Begin by placing the cooled cakes on a cutting board. Cut the cakes into small pieces that are the right size to fit into a food processor.
This makes it easier to achieve a fine, crumbly texture that’s perfect for forming into munchkins. Once cut, transfer these cake pieces into the food processor and pulse them until they break down into fine particles.
Forming the Donut Holes
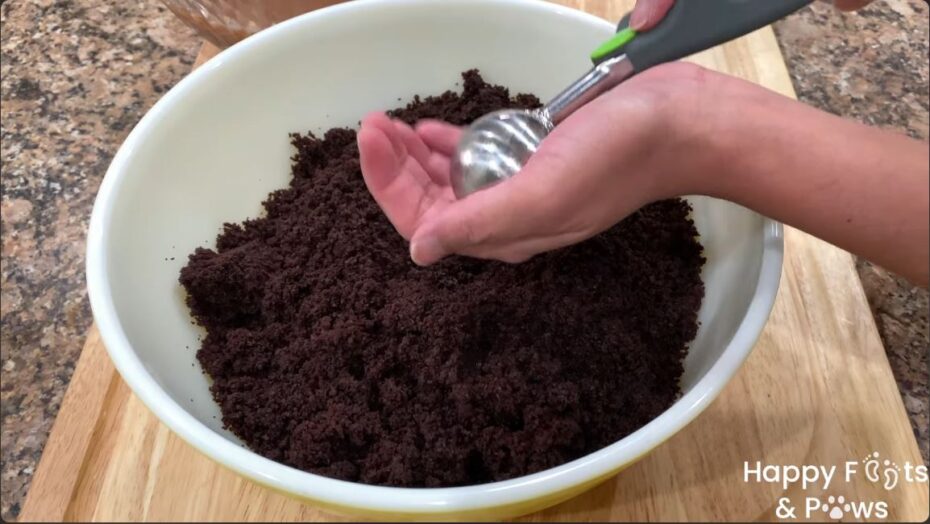
After achieving the desired texture, move the ground-up cake to a large bowl. This is where the fun part begins: shaping the cake crumbs into small, bite-sized balls. Once you’ve formed these balls, dip each one into the chocolate ganache you prepared earlier.
Make sure each ball is evenly coated with the ganache for that rich, chocolaty flavor in every bite. To remove any excess ganache, use a fork to transfer the coated balls onto a wire rack, allowing the extra chocolate to drip off. Let them sit for about 2 minutes to ensure there’s no excess chocolate left.
Dipping Them In the Ganache and Coating
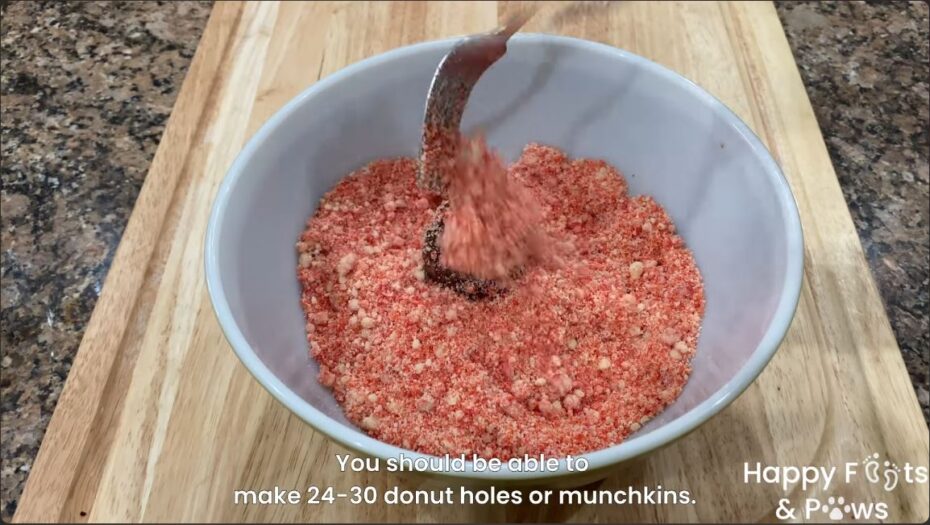
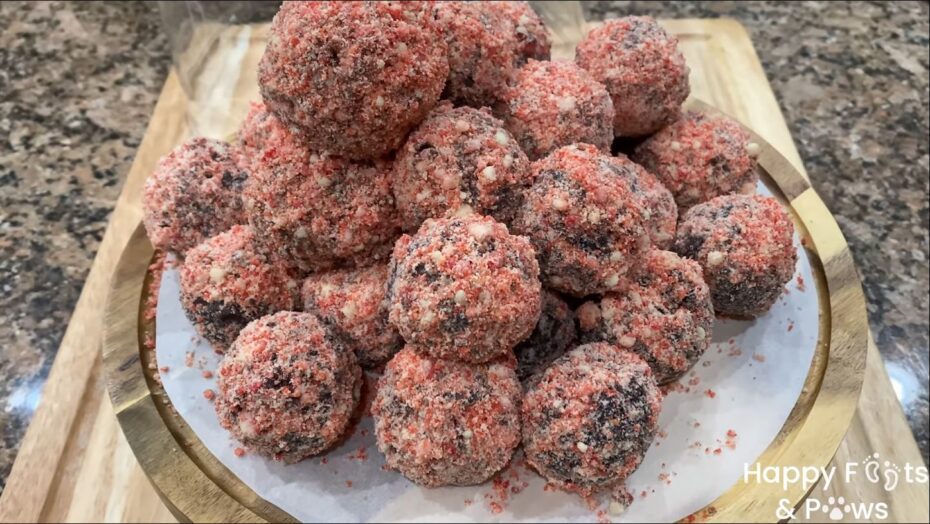
The final touch involves generously rolling the balls in the butternut streusel or crumb toppings you prepared, giving them their signature look and added texture. Once coated, arrange the Chocolate Butternut Munchkins on a cake platter or stand, ready to be served. This assembly process not only brings together all the flavors and textures of this delightful treat but also showcases your baking creativity and skill.
I hope you enjoy! Here is how mine turned out.
Please consider subscribing to our YouTube channel.
Did you enjoy this recipe? Please leave a review.

I couldn't stop my family from eating these. Even better than I've had before in the store!